Feature Overview
n8n is a flexible workflow automation platform that lets you connect dozens of services in visual flows. The Agencii n8n community node (n8n-nodes-agencii) connects your agents to these workflows so your agencies can receive tasks, run tools, and send back answers directly inside n8n.
Prerequisites
- Agencii Platform account with at least one deployed agency and agent.
- Platform API Key – available under Settings → API Keys in the Agencii dashboard.
- n8n instance with permissions to install Community Nodes.
Existing users currently need to use a self-hosted n8n instance to install the Agencii community node, as the
n8n-nodes-agencii npm package is in the process of verification. For more details on how this works in n8n, see the n8n community nodes installation guide at https://docs.n8n.io/integrations/community-nodes/installation/.Step 1: Set up n8n Integration in Agencii
Create an n8n Platform integration
-
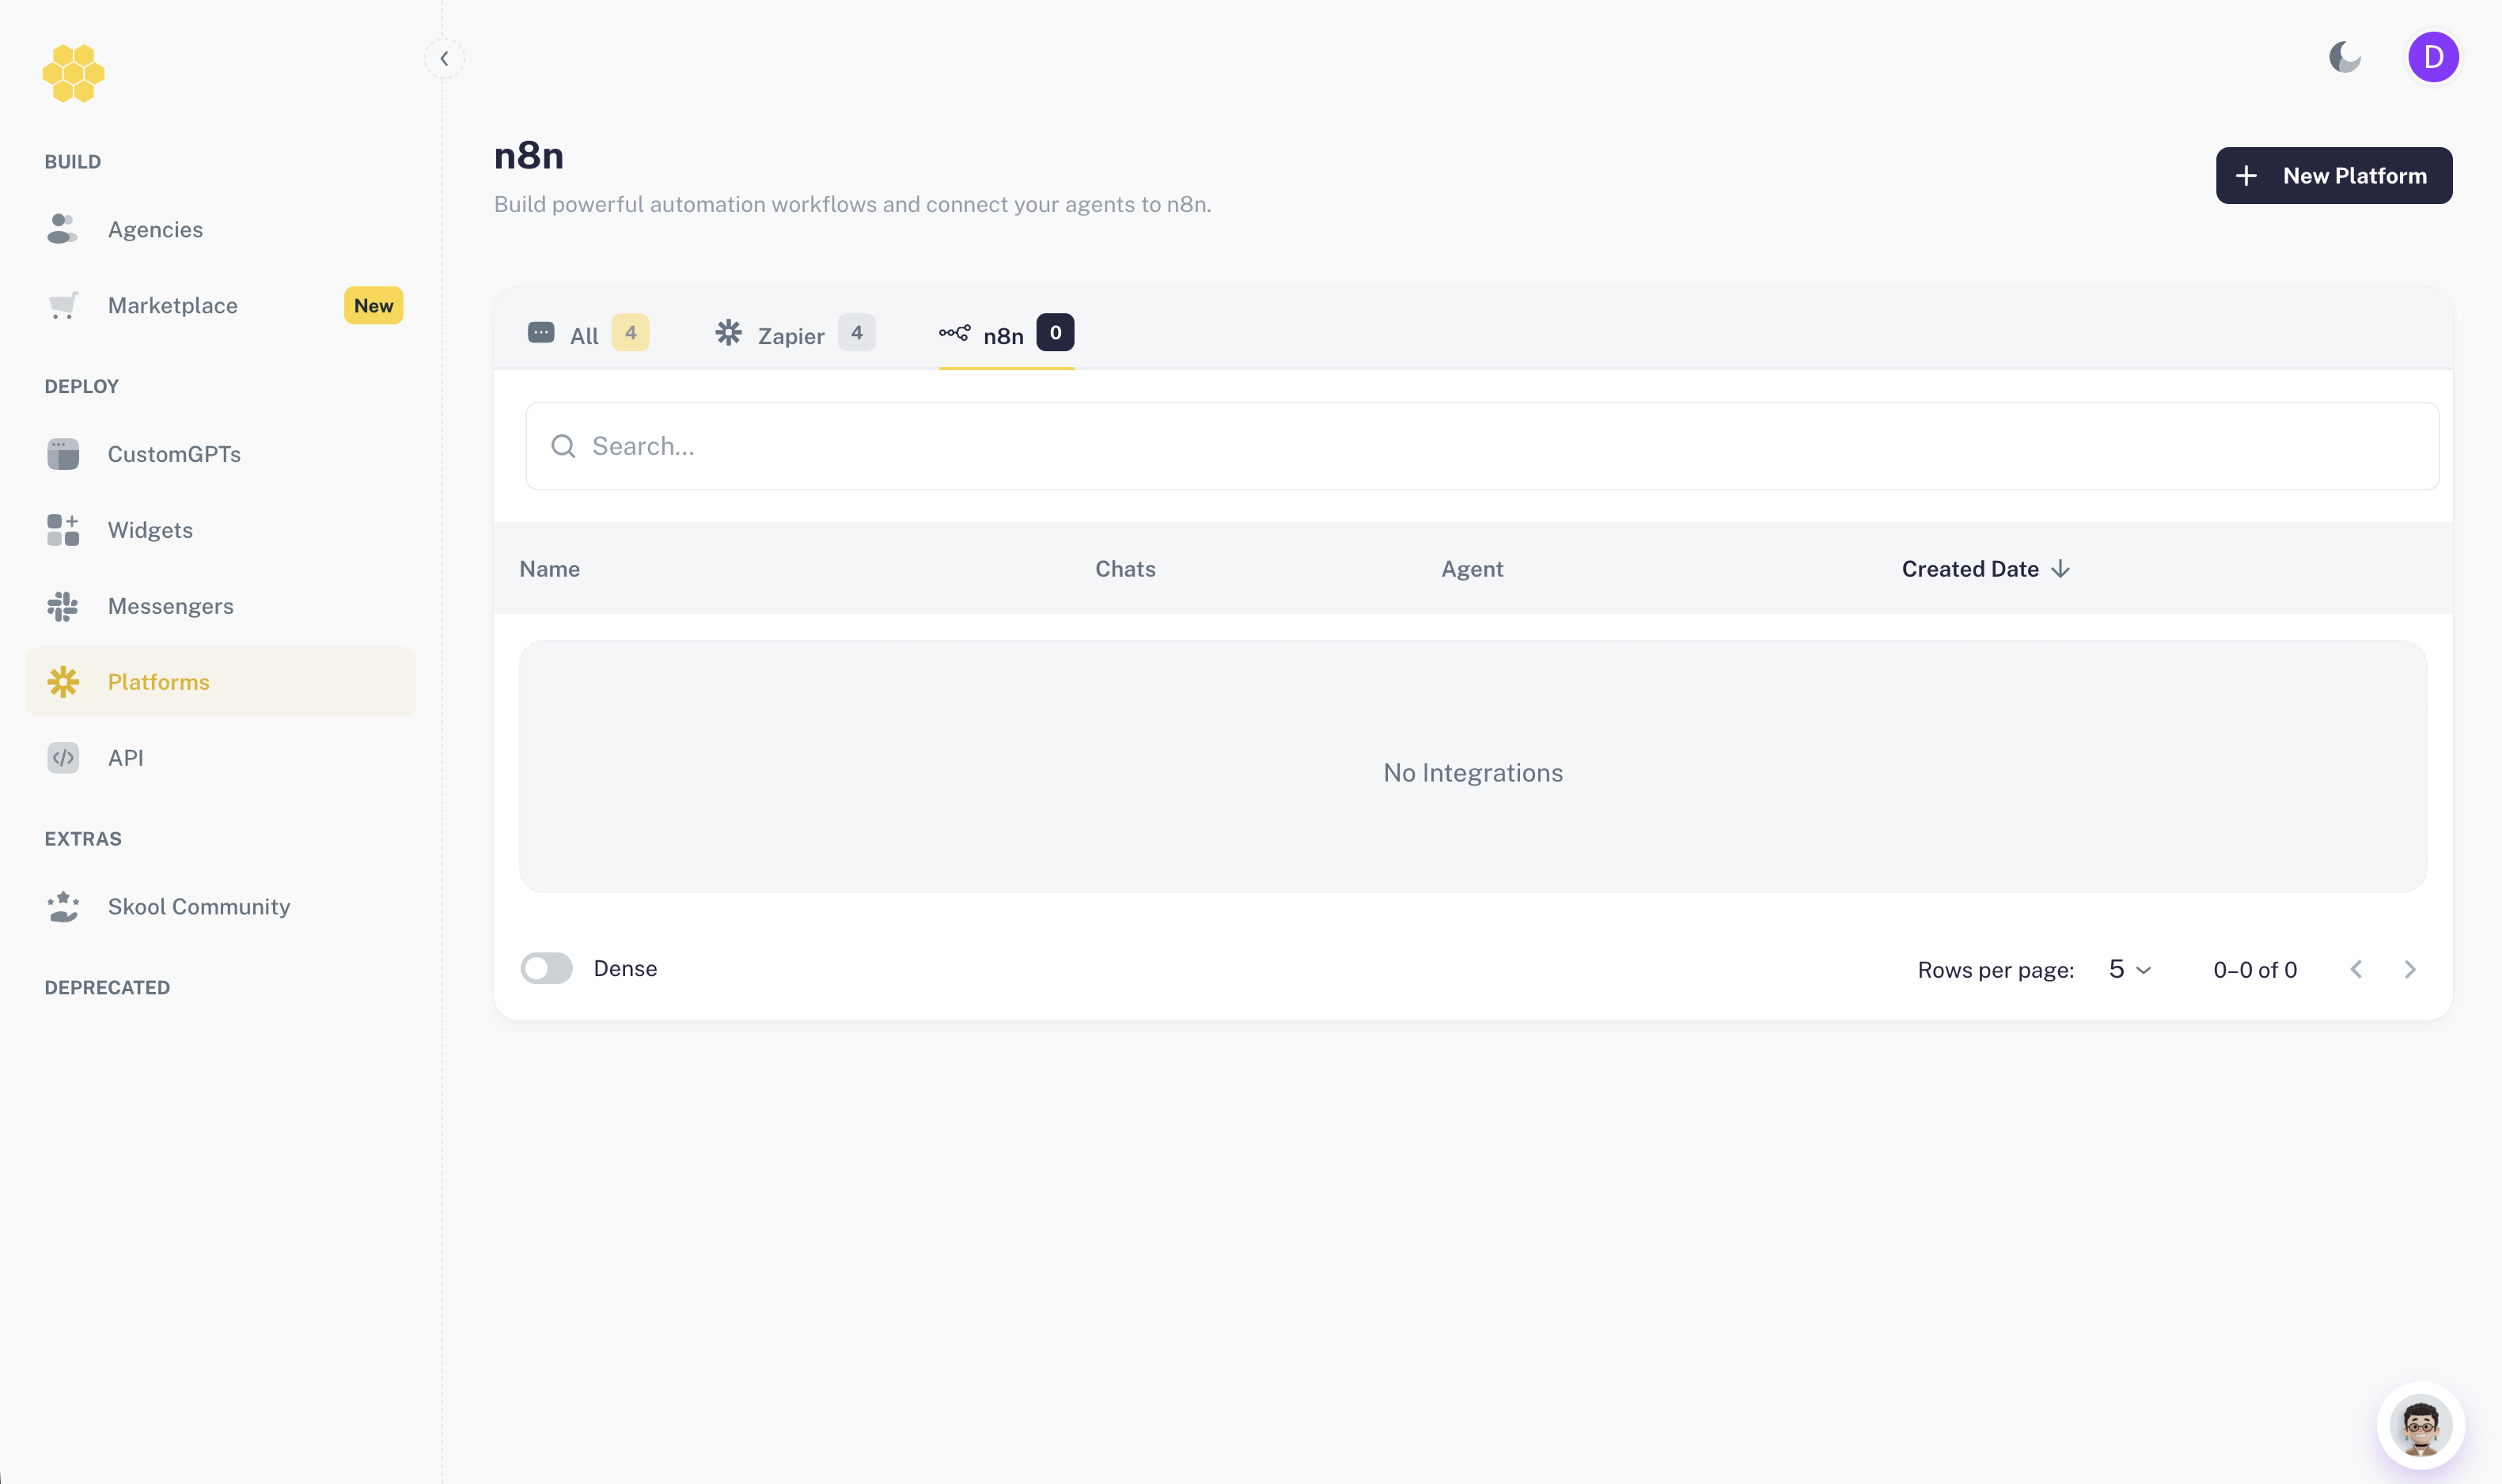
In the Agencii dashboard, open Deploy → Platforms from the sidebar and click New Platform.
-
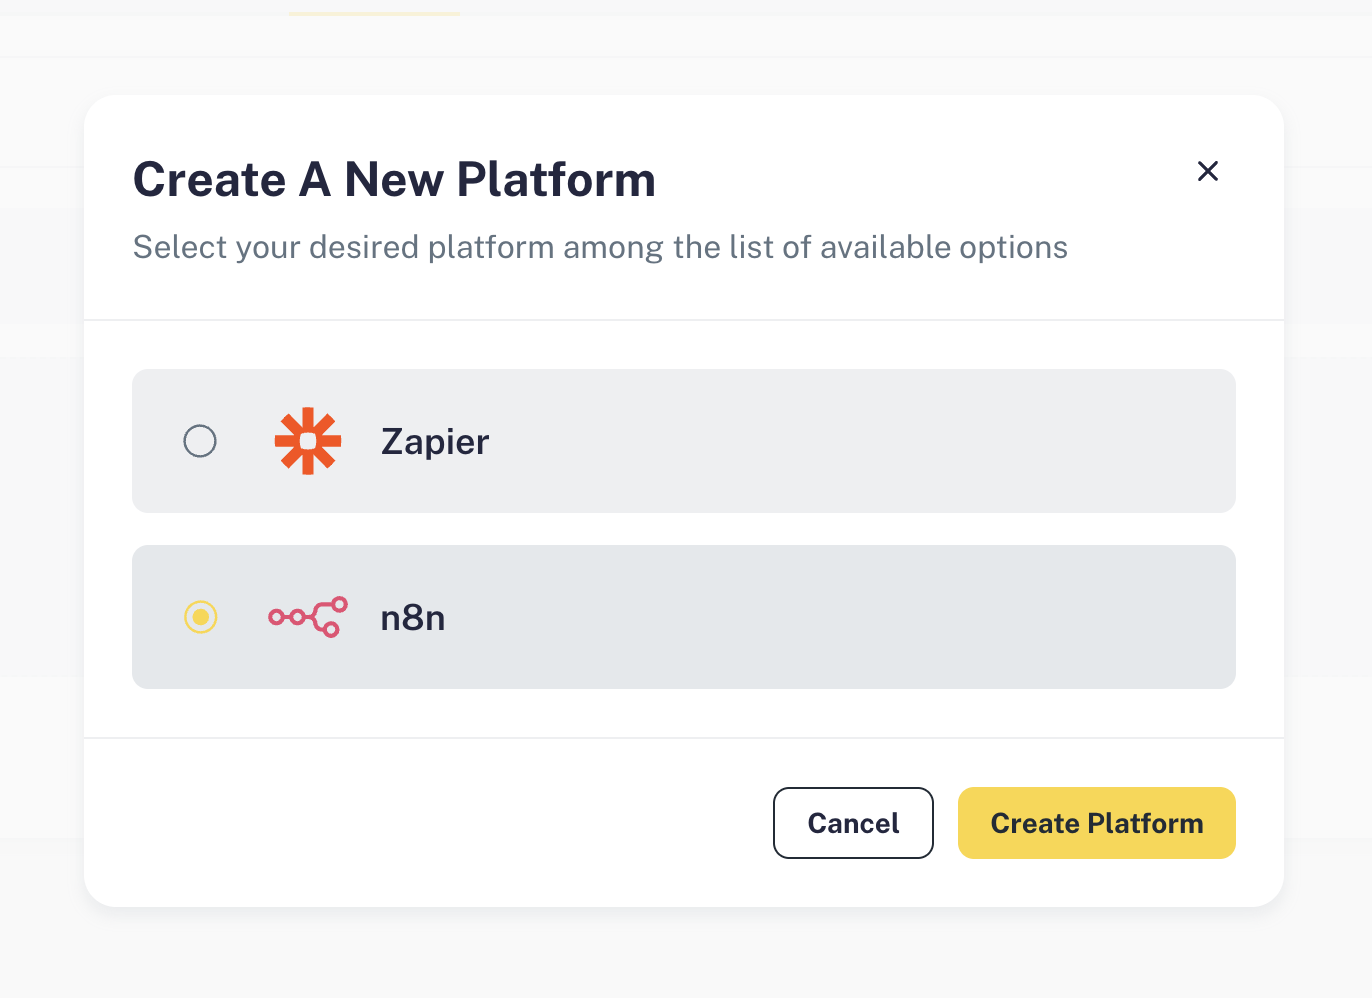
In the Create a New Platform dialog, select n8n and click Create Platform.
-
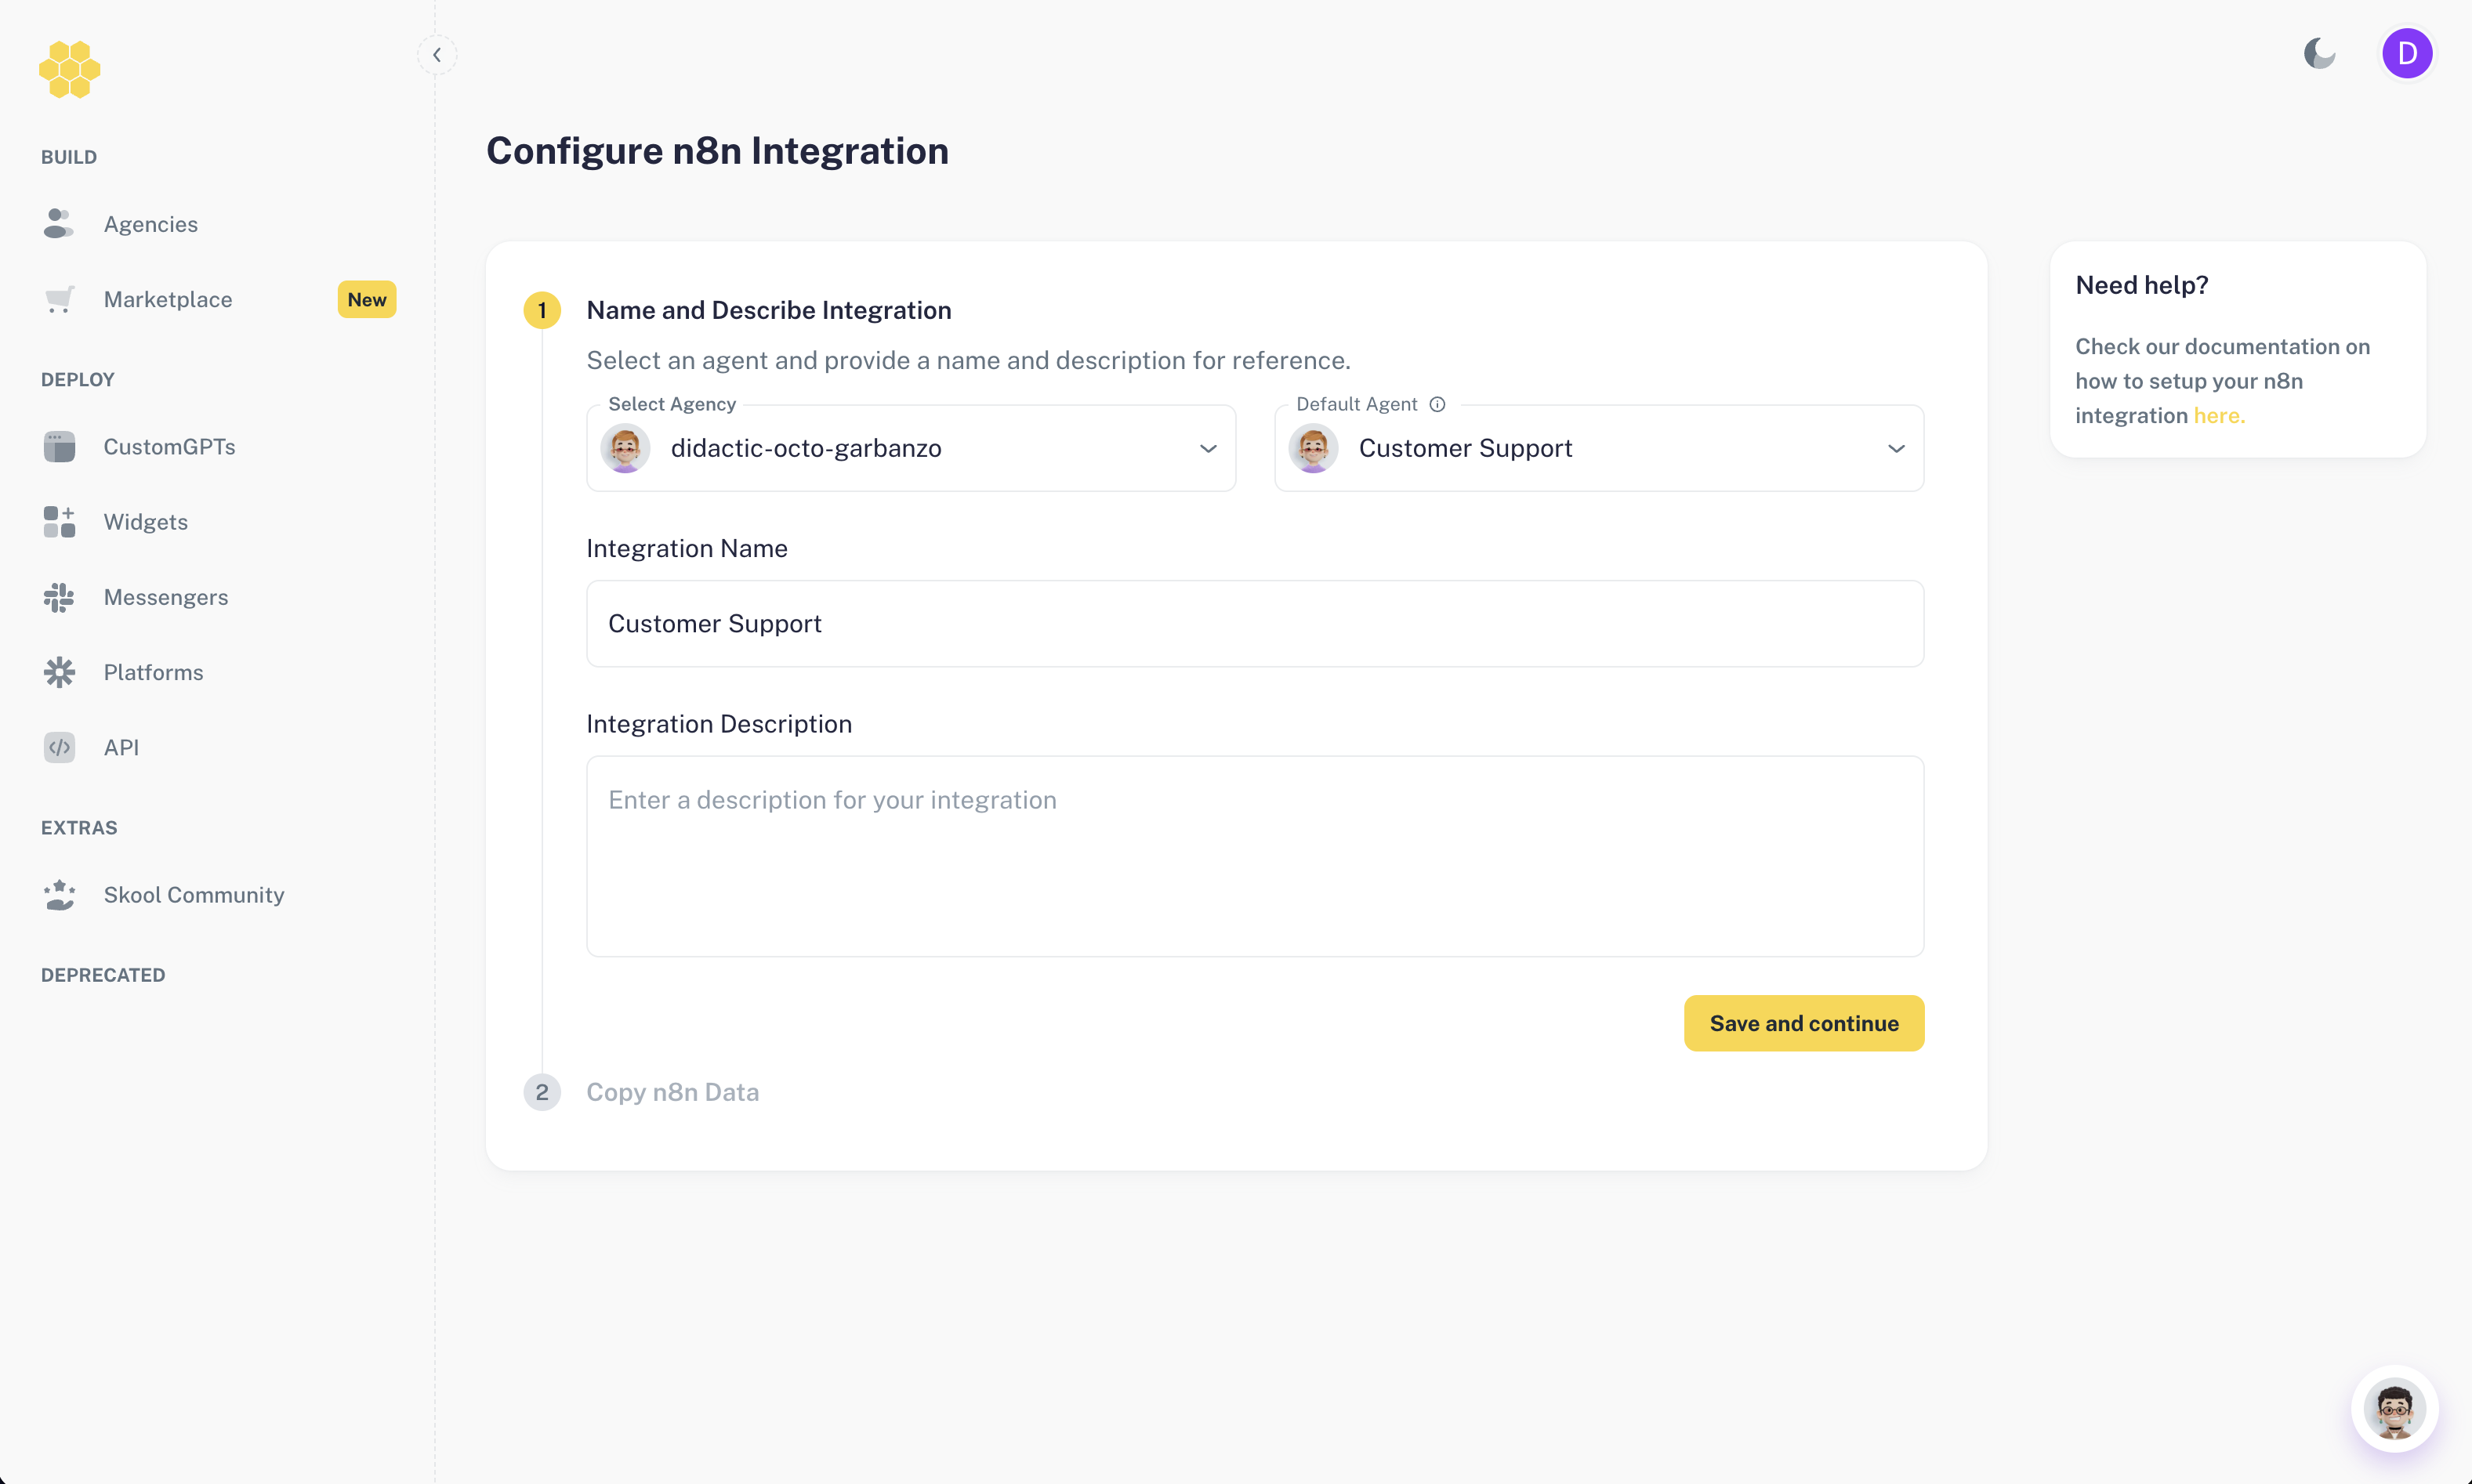
On the Configure n8n Integration screen, choose:
- Agency – the agency you want n8n to talk to.
- Default Agent – the agent that will receive messages from this integration.
- Integration Name – an internal name that will also help you identify the node inside n8n.
- Integration Description – optional context for future reference.
-
Click Save and continue.
Copy integration data for n8n
After saving, you’ll see the Copy n8n Data screen. It includes:
-
NPM package name:
n8n-nodes-agencii– used to install the node in n8n Community Nodes. - Integration ID – a unique identifier that routes messages from n8n to this specific Agencii integration.
-
API Key hint – your first platform API key (you can manage keys under Settings → API Keys).
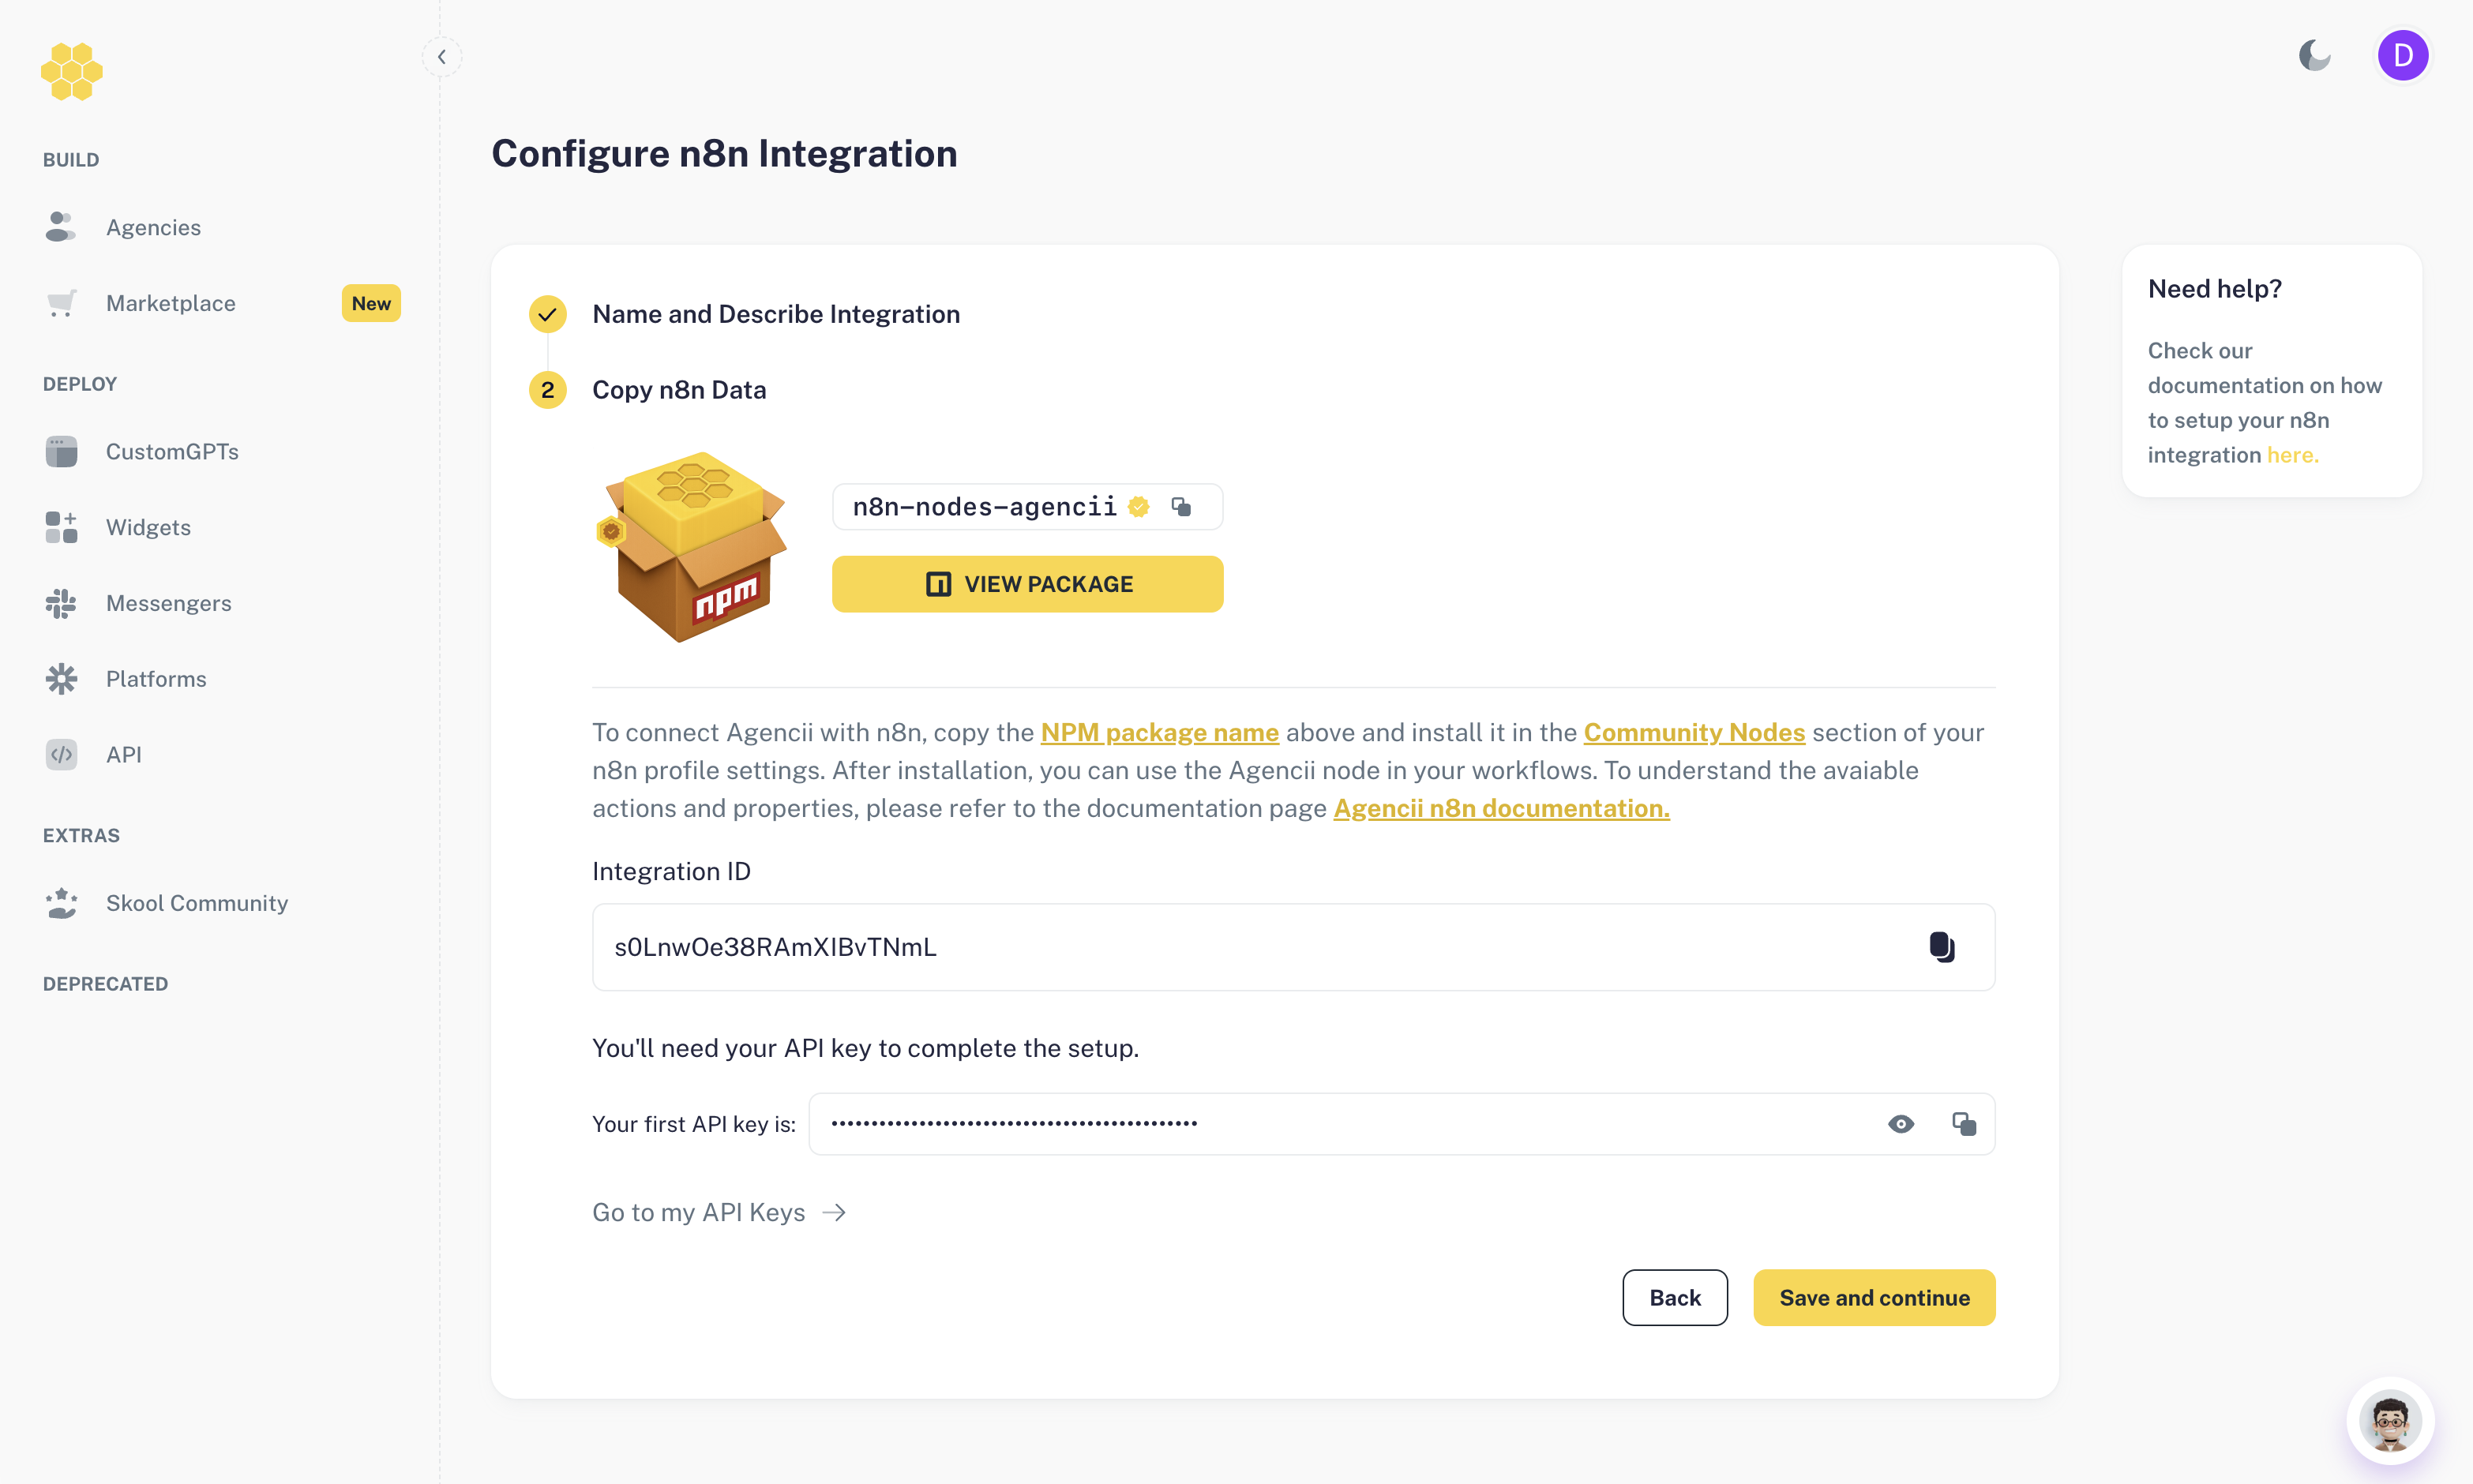
To connect Agencii with n8n, copy the NPM package name above and install it in the Community Nodes section of your n8n profile settings. After installation, you can use the Agencii node in your workflows. To understand the available actions and properties, please refer to the Agencii n8n documentation page.
Step 2: Install the Agencii Community Node in n8n
Install the node
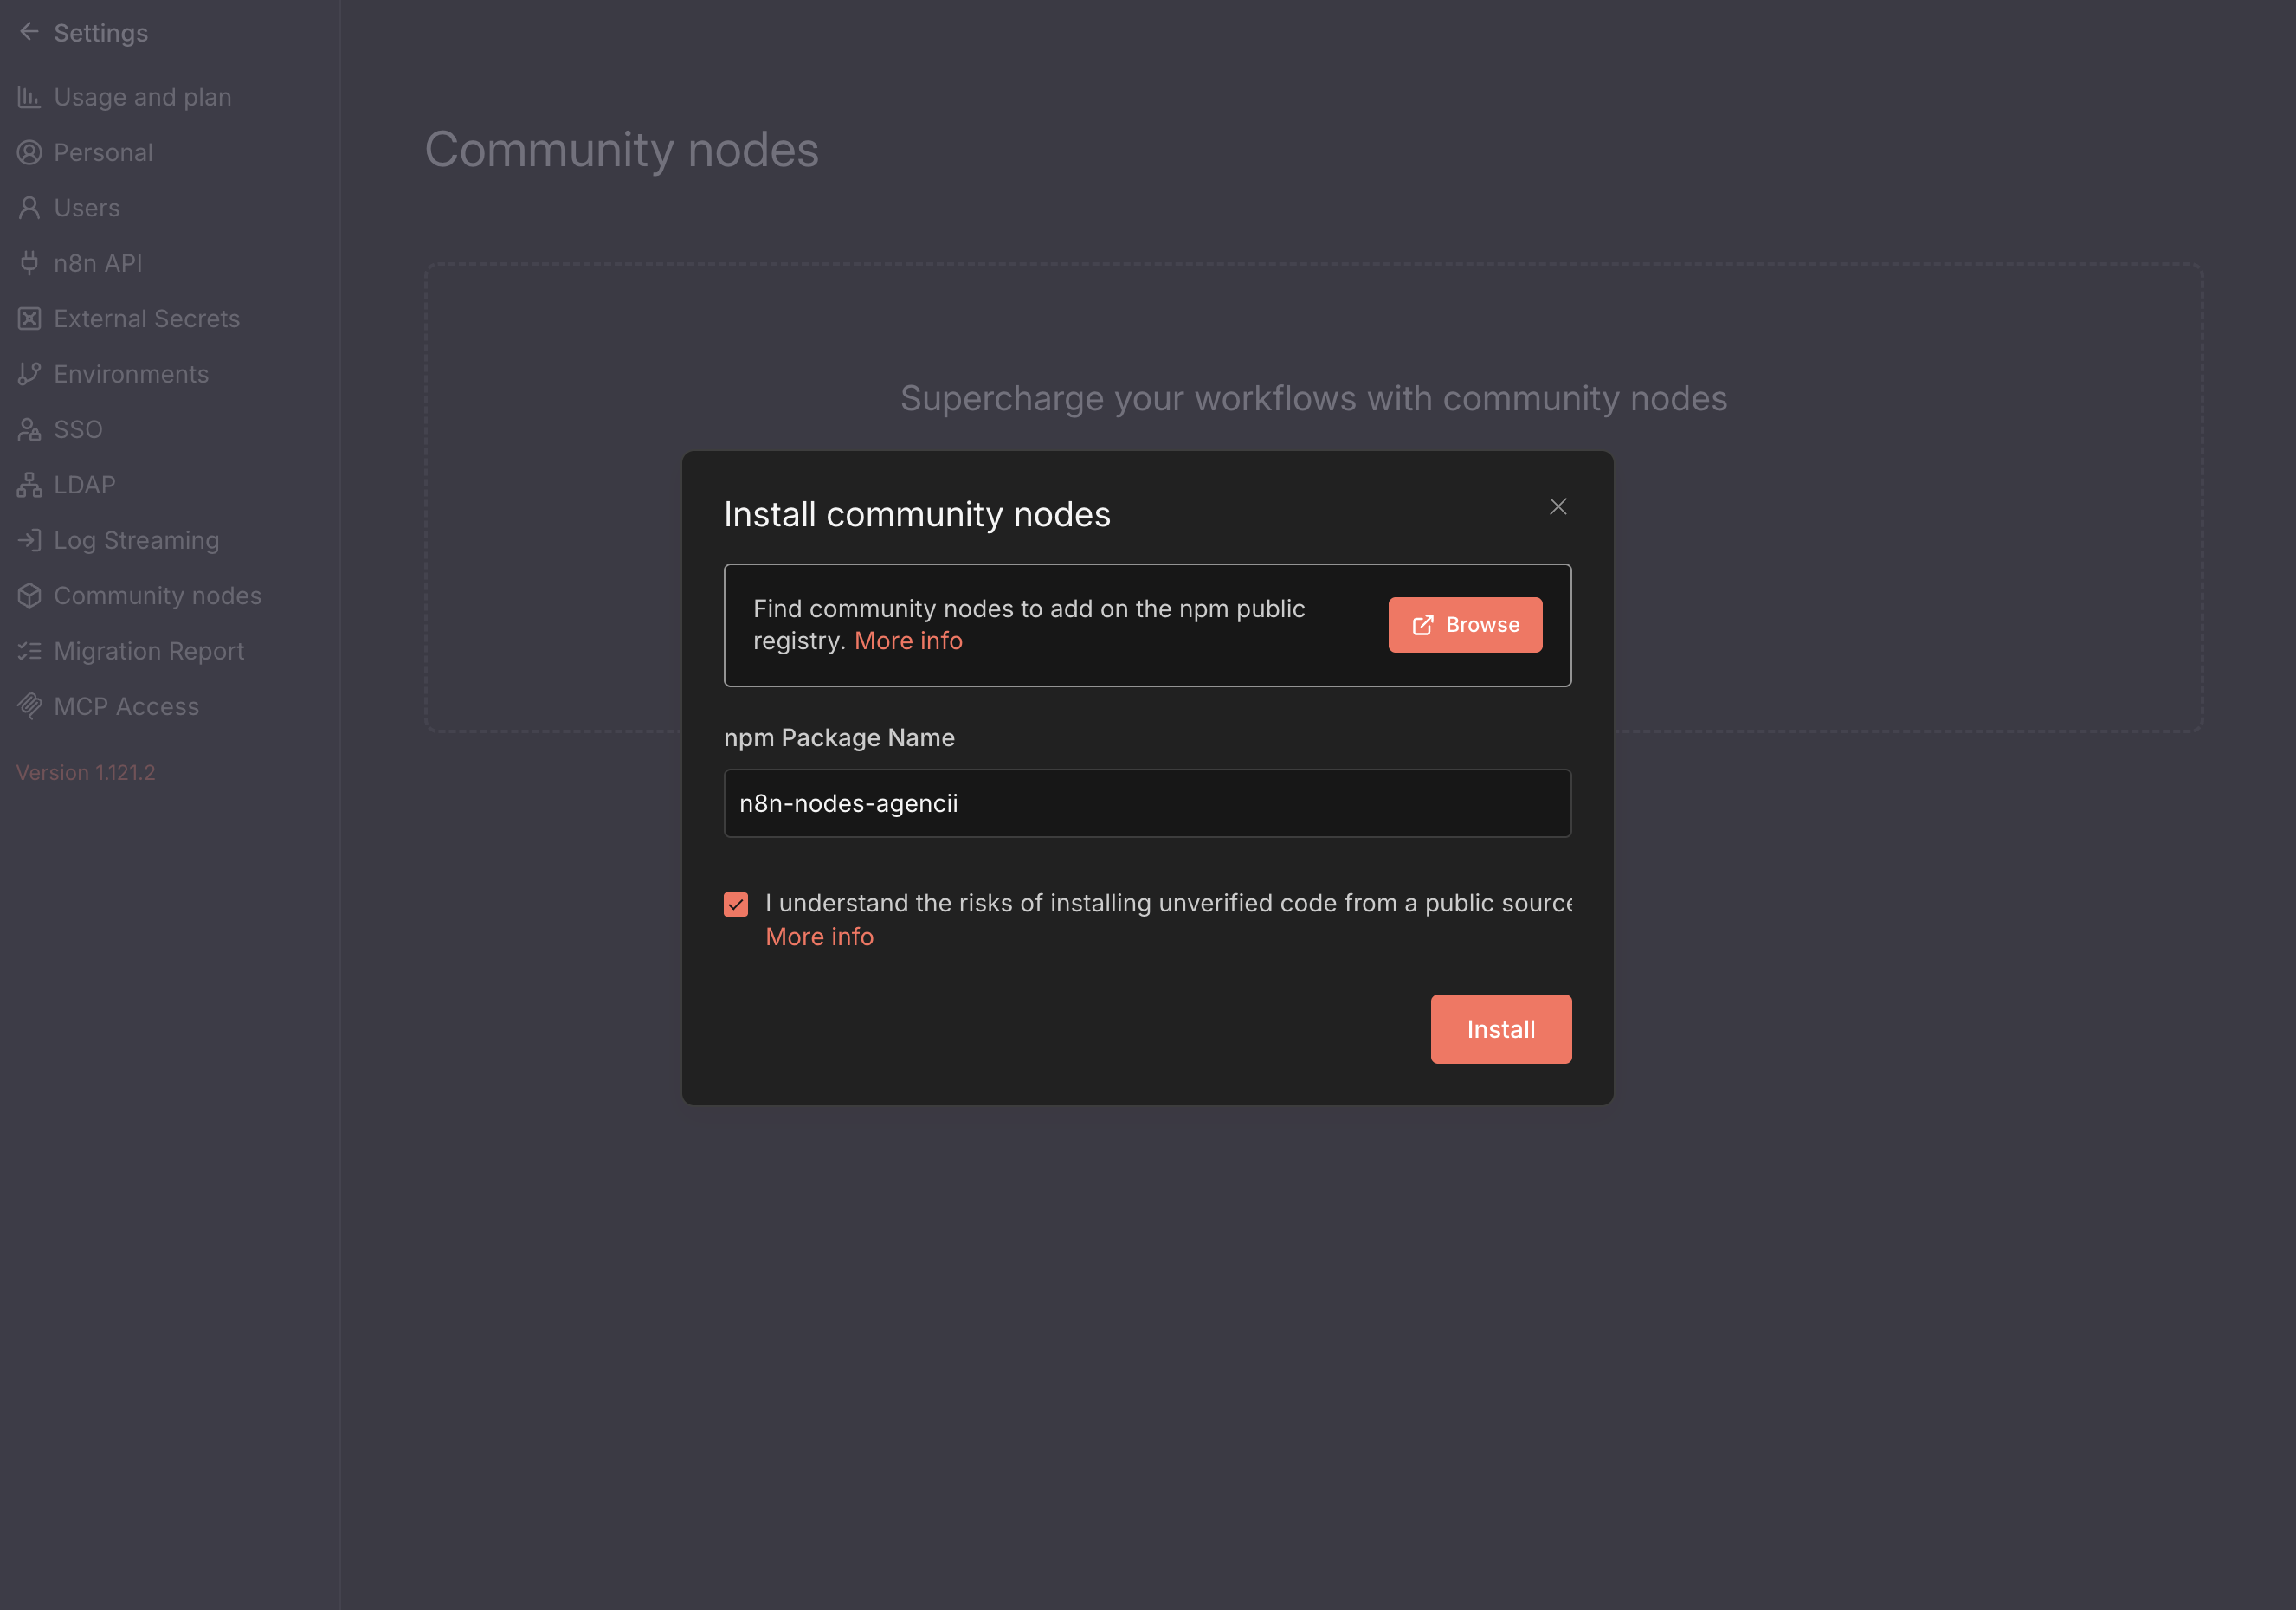
- In your n8n instance, go to Settings → Community Nodes. You can learn more about installing and managing community nodes in the official n8n docs at https://docs.n8n.io/integrations/community-nodes/installation/.
-
Click Install and enter the package name:
-
Confirm the installation. After it completes, an Agencii node will appear in your n8n node palette.

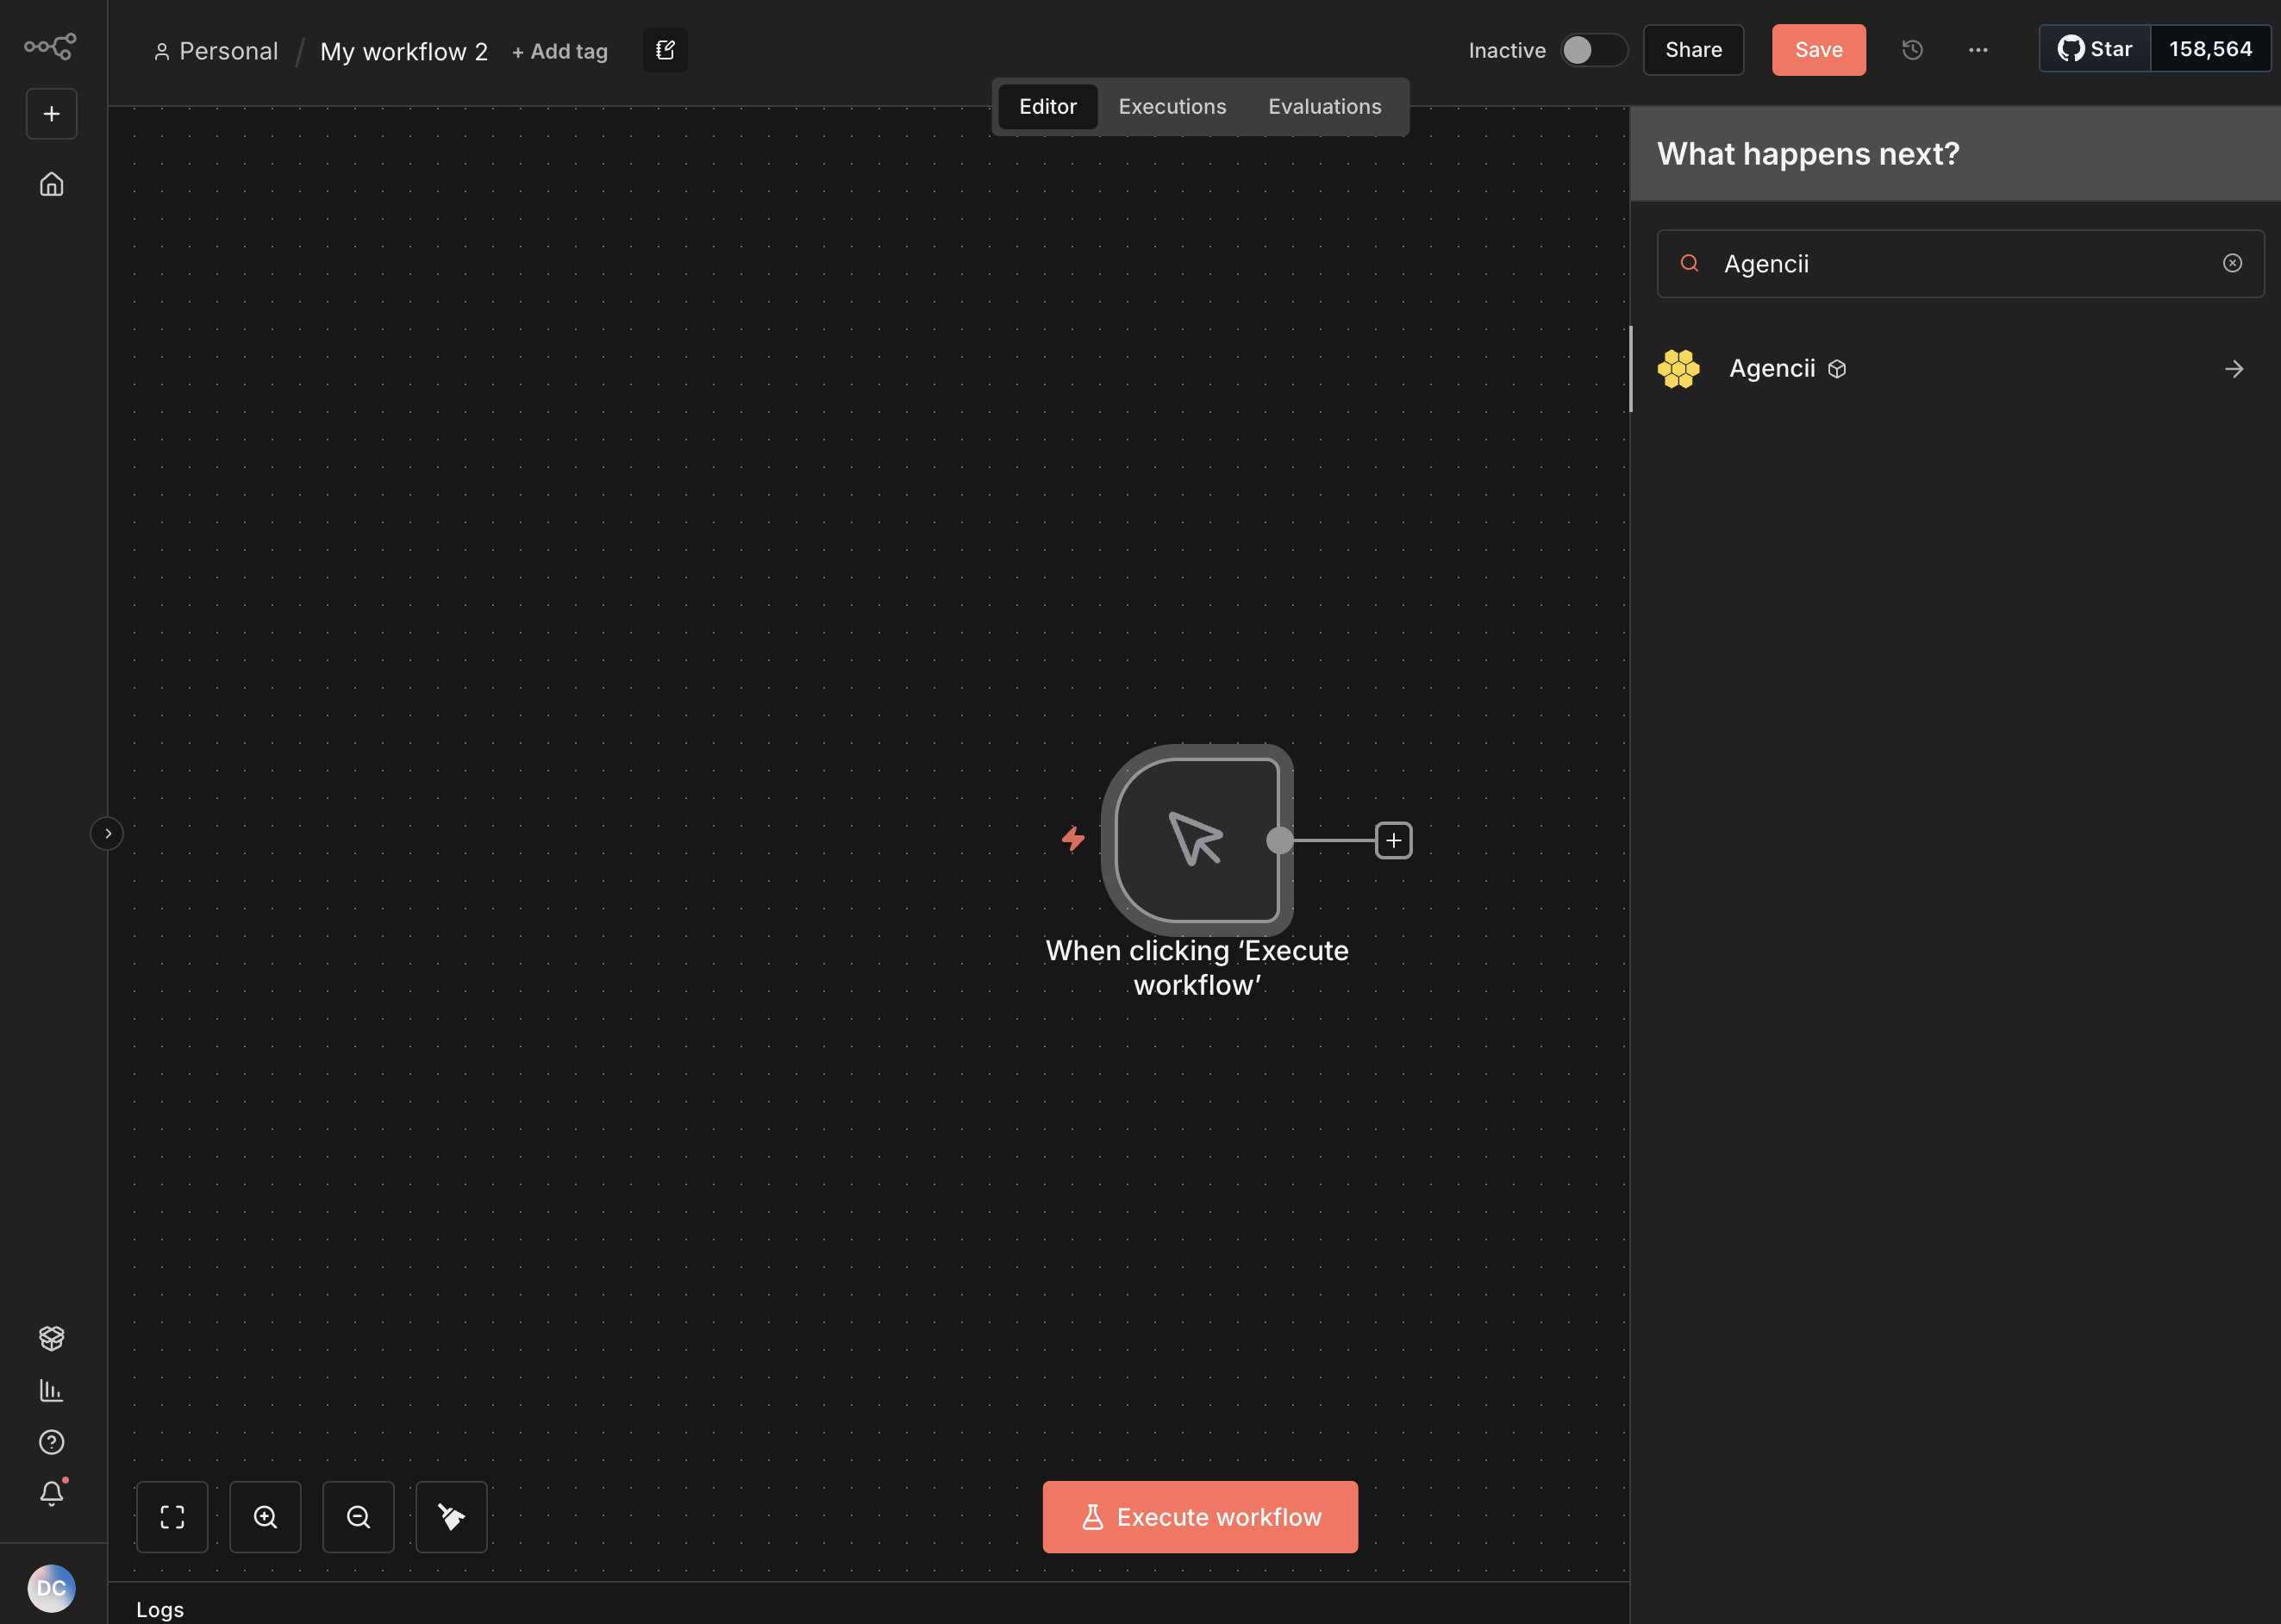
Step 3: Use the Agencii Node in a Workflow
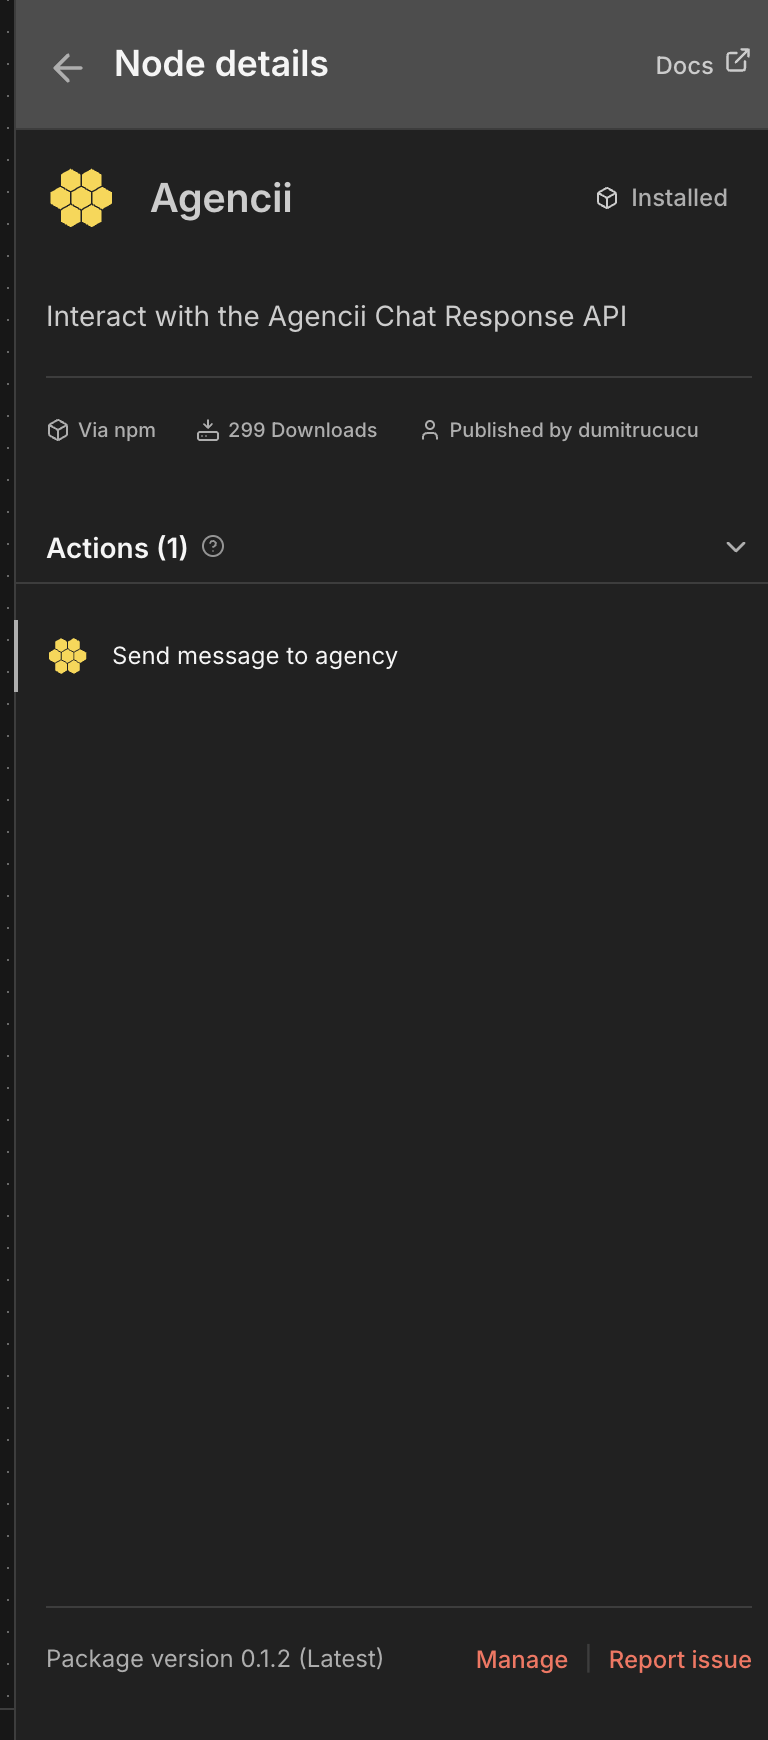
The Agencii node exposes a single operation designed to send messages to your agency and receive structured responses.Configure the Agencii node
- Add an Agencii node to your workflow.
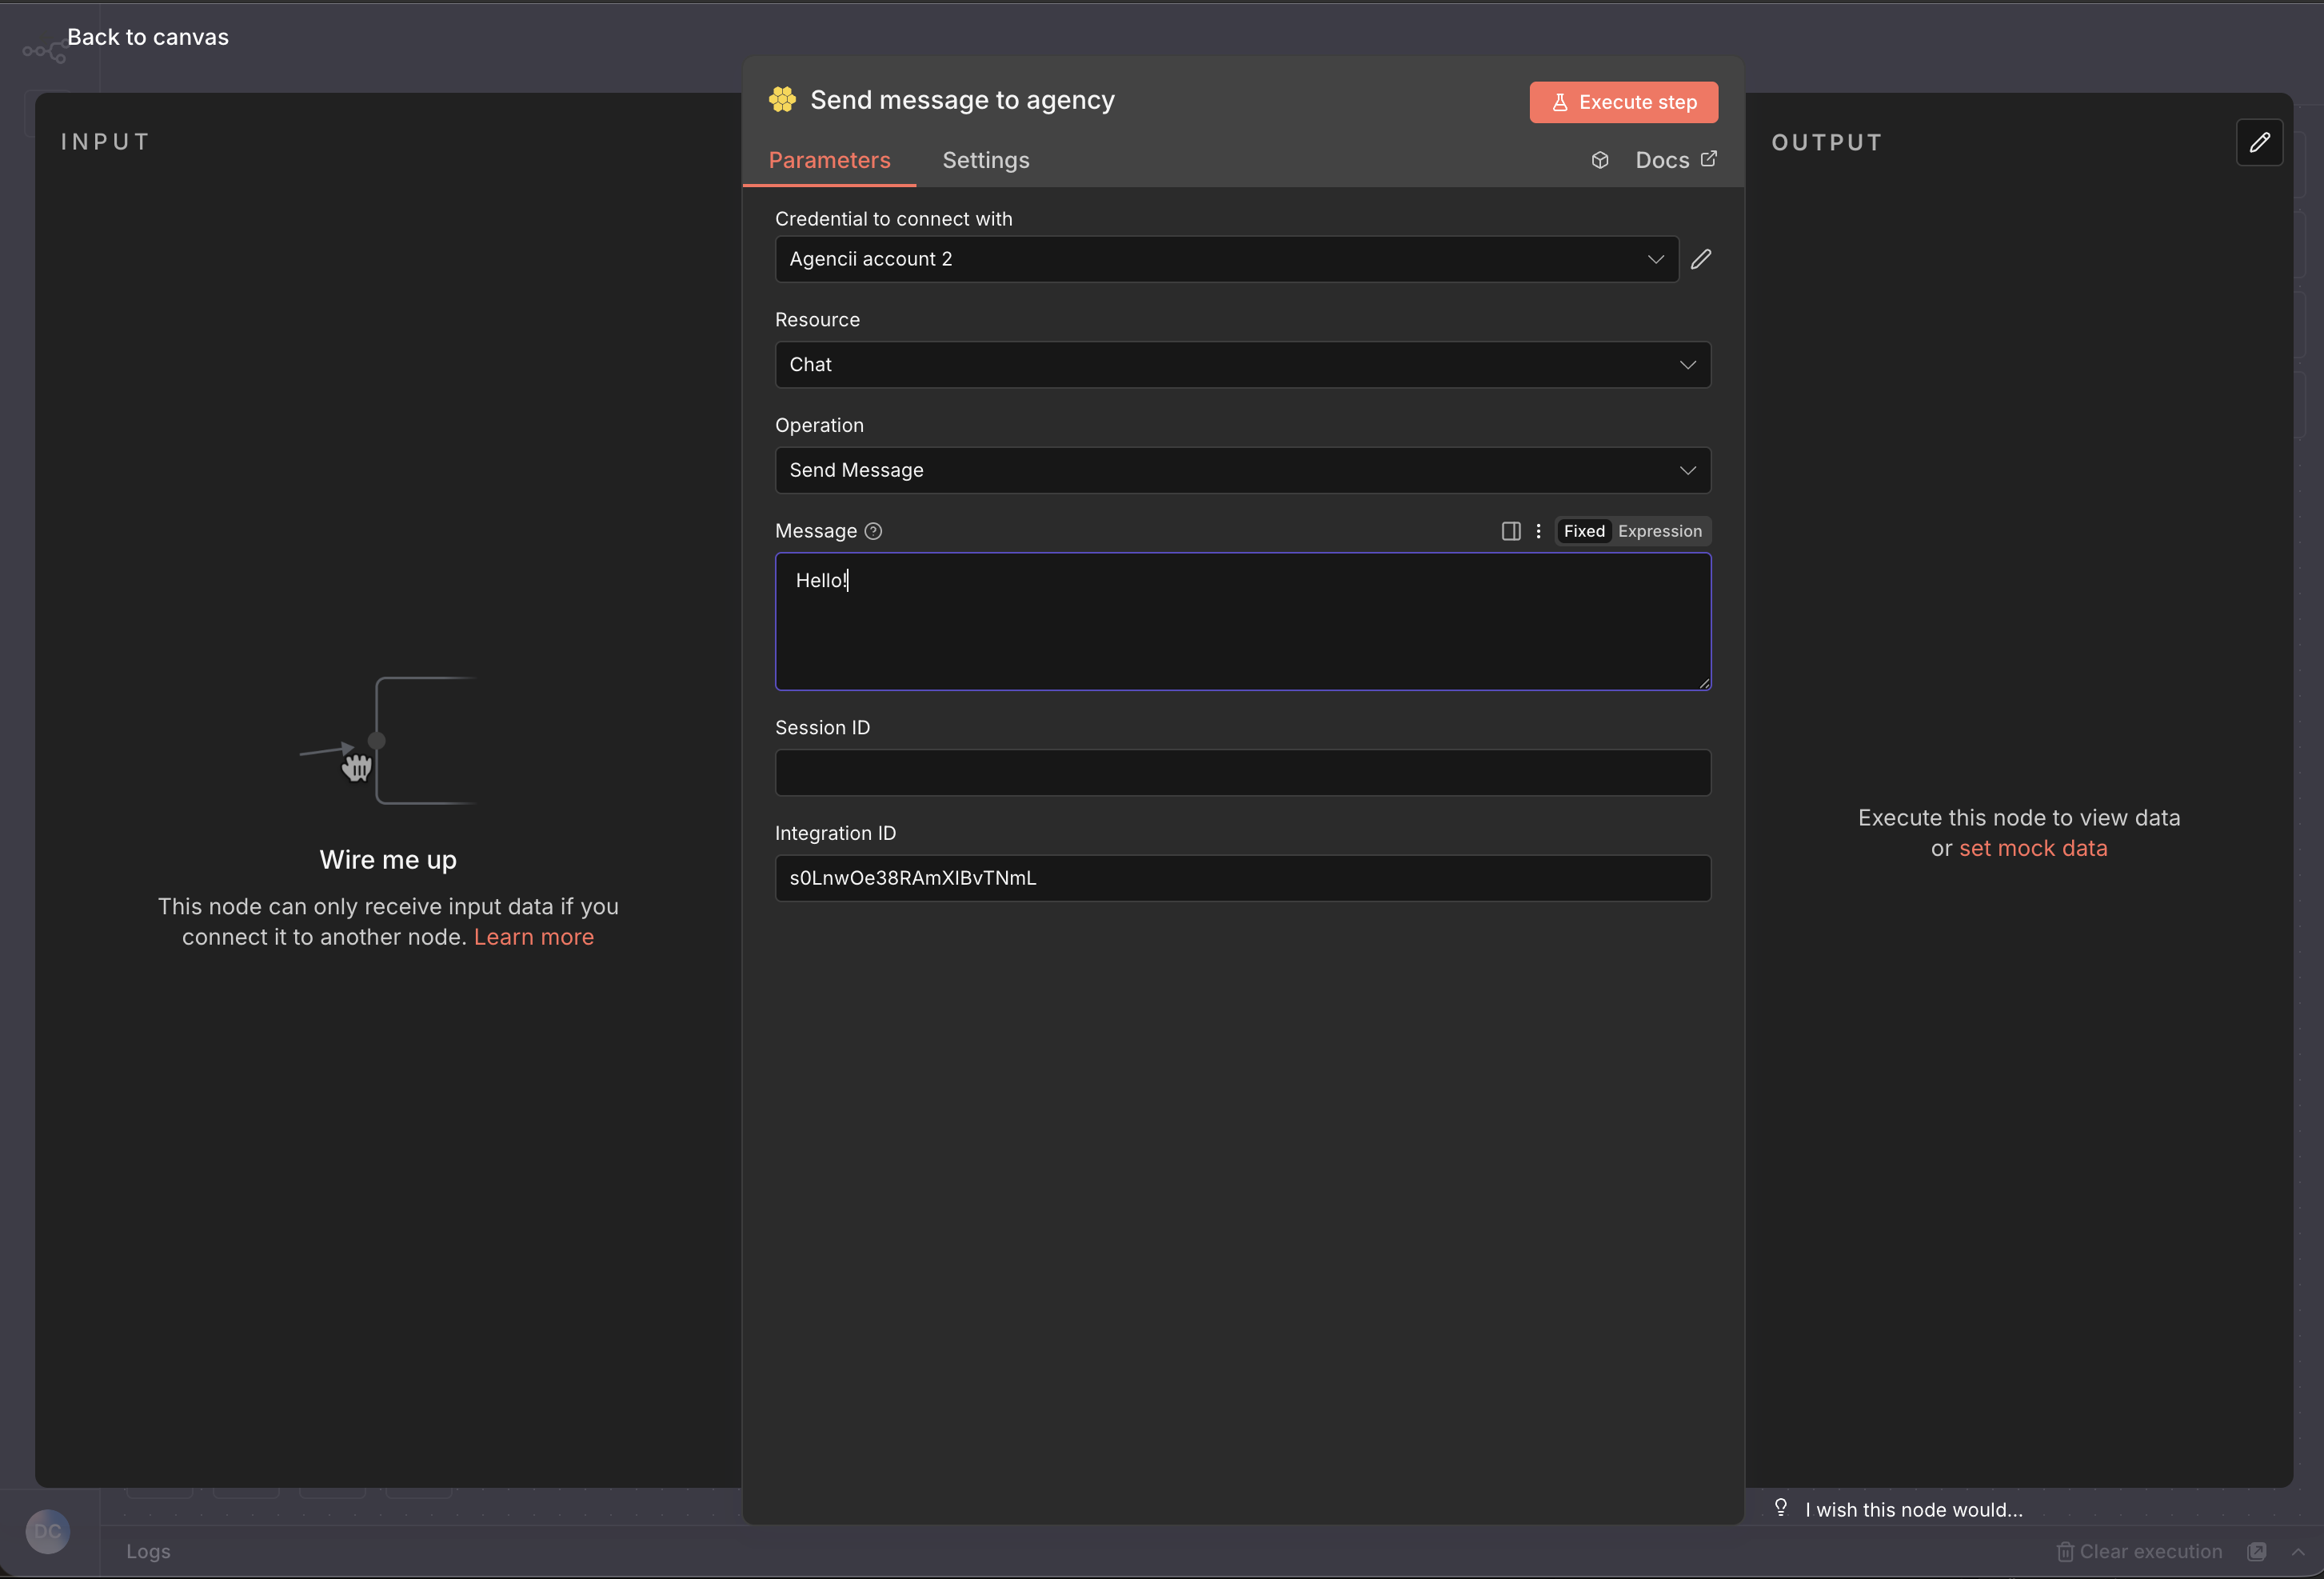
- Select your Agencii API credentials.
- Under Resource, choose Chat, and under Operation, select Send Message.
- Configure the main fields:
- Integration ID (required) – paste the Integration ID from your Agencii n8n Platform integration.
- Message (required) – the prompt or instruction you want your default agent to process.
-
Session ID (optional) – reuse the
sessionIdfrom a previous run to continue the same conversation; leave empty to start a new session.
Understand the node output
The Agencii node returns a JSON payload with (among others):
text/response– the main answer from your agency.sessionId– the session identifier to reuse for multi-turn conversations.n8nIntegrationId– the platform integration that handled the request.
Example Use Cases
- Human-in-the-loop review – send form or CRM data to your agency, then route the response into an approval step.
- Content generation pipelines – trigger the Agencii node from schedules or webhooks and store generated content in Google Sheets, Notion, or a database.
- Multi-step analysis – chain multiple Agencii nodes while reusing
sessionIdto keep context across data enrichment, analysis, and recommendation steps.

